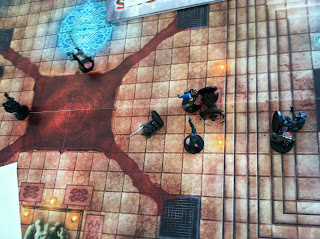
My group eventually got to the bottom of the the Keep on Shadowfell and I was able to use the provided maps to their full intent. Funny part was the groups ranger was unable to show up for this encounter, and this was the first time there was a massively large open area to fight in.
Oddly enough the final fights where very anti-climatic. The group stood on the stairs as I acted out the events. Nothing really happened, except a bunch of murder. From then on, I really wanted to go overboard with a "Final" campaign fight, so I thought up a war to be waged on the keep.
Wednesday, December 14, 2011
Monday, December 5, 2011
Keep on the Shadowfell Dungeon
When taking my first ever D&D group through the Keep on the Shadowfell adventure I took the basic layout and desgined off of what they had provided.
I purchased a set of the D&D Dungeon Tiles and a number of 2' x 3' black foam boards. I used those as a backing to tape the tiles onto. But even given that large of a canvas, I had to break up the dungeon into separate levels.
The following images few rooms I built, with some of my players on the board. Unfortunately there are not many, well just two:
After the group battle their way through two levels of the dungeon, they eventually came across the mega custom room that I built for and epic boss show down:
The features of this room where:
After the boss room occurred, I finished off the dungeon with the last two levels from the adventure packet. Overall the dungeon went pretty well.
I purchased a set of the D&D Dungeon Tiles and a number of 2' x 3' black foam boards. I used those as a backing to tape the tiles onto. But even given that large of a canvas, I had to break up the dungeon into separate levels.
The following images few rooms I built, with some of my players on the board. Unfortunately there are not many, well just two:
After the group battle their way through two levels of the dungeon, they eventually came across the mega custom room that I built for and epic boss show down:
The features of this room where:
- Drinking from the cauldron caused you to be bloodied (no health loss) and damage would be increased by 1d12.
- The skull piles near the cauldron would explode they where hit by a burst or blast fire attack, causing 2d10 per pile.
- Falling in the hole was instant death.
- The Blood glyph allowed the boss to perform two basic attacks.
- The Boss when he was killed would resurrect at the top of the Skull Pile, until the Skull Pile was destroyed.
- While the Boss was near the Flaming Statue within its Aura 5 it grants the Boss an ongoing 5 fire damage to his attacks.
After the boss room occurred, I finished off the dungeon with the last two levels from the adventure packet. Overall the dungeon went pretty well.
Subscribe to:
Comments (Atom)


